Complexity Theory - What is it?
Art that promotes spontaneous learning through:
1. neighboring interactions
2. diversity
3. common ground (allows for communication)
4. decentralized network
It is a really interesting theory and I think a very fitting theory for the classroom. It is all about creating social interactions and forming art. The classroom is full of opportunity for socializing with neighbors.
Integrated Lesson
Tiffany & Nichole
Ecology and Complexity Theory and Science
Exploration: Students will explore the Ecology and Complexity Theory.
Objective: Students will be able to understand the Ecology and Complexity Theory and how it applies to a natural habitat.
State Standard:
Grade: 4 Art
Standard: 1
Objective 1- Use value, color, and texture to create interest
Grade: 3 Science
Standard: 2
Objective 1- Classify living and nonliving things in an environment.
Identify characteristics of living things (i.e., growth, movement, reproduction).
Identify characteristics of nonliving things.
Classify living and nonliving things in an environment.
Objective 2- Describe the interactions between living and nonliving things in a small environment.
Identify living and nonliving things in a small environment (e.g., terrarium, aquarium, flowerbed) composed of living and nonliving things.
Predict the effects of changes in the environment (e.g., temperature, light, moisture) on a living organism.
Observe and record the effect of changes (e.g., temperature, amount of water, light) upon the living organisms and nonliving things in a small-scale environment.
Compare a small-scale environment to a larger environment (e.g., aquarium to a pond, terrarium to a forest).
Pose a question about the interaction between living and nonliving things in the environment that could be investigated by observation.
Artists Discussed: Andy Goldsworthy, Harrell Fletcher and Miranda July, Michel Swaine, Mel Chin, Christo and Jeanne-Claude
Other Subject Connections: Science: Ecology
Teacher Visuals/ Supplies: PowerPoint on Ecology and Complexity Theory, crayons, paper, scissors, glue, large piece of blue paper
Preparation: Set the blue paper in a central location, set the glue next to the blue paper, have items with different textures available to use as a rubbing, have scissors, crayons, and paper at students desks.
Student Materials:
• Different Textures
• 8x11 white paper
• Crayons
• Big piece of Blue paper
• Scissors
• Glue sticks
• Pictures of different habitats
Lesson Sequence:
1. Discuss the idea of Ecology and Complexity
2. Discuss Harrell Fletcher and Miranda July, and their Learning to Love You More project, and how they don’t know the outcome or what people may get from it, but talk about how the website effects many different people.
3. Discuss Andy Goldsworthy and how he uses things found only in nature.
4. If you needed to add in another subject you can talk about the different habitats of animals, we used the ocean habitat. You can talk about how things are intertwined and with slight changes the entire habitat can be changed.
5. Talk about the difference between living and non-living organisms.
6. Get pictures and have the students indentify the living and non-living organisms.
Assessment:
• Discuss what a habitat is, and how it can be affected by simple things, like a change in the temperature.
• Have students find textures in the room or outside and create a texture rubbing, after creating the texture rubbing have the student cut out a shape of something found in the ocean. Have the student paste their cutouts on the blue paper to create a habitat for the ocean.
Resources:
Nga.gov
http://en.wikipedia.org/wiki/Andy_Goldsworthy
http://leslieschachter.wordpress.com/2008/11/24/profound-people/
www.pdx.edu/.../majors-programs-fact-sheets
http://www.schools.utah.gov/curr/sci/elem/default.htm
http://www.softpedia.com/screenshots/DPSM-Underwater-Ocean-ScreenSaver_1.jpg
http://media-2.web.britannica.com/eb-media/35/62235-004-184F1FEC.jpg
http://images.google.com/imgres?imgurl=http://www.growseed.org/pond.jpg&imgrefurl=http://www.growseed.org/aquaponics.html&usg=__LxX7-pA2AzTC8b0PgqCnASrVXw0=&h=360&w=358&sz=67&hl=en&start=3&sig2=6YCs5ra0ylKBwqX4cINiFw&um=1&tbnid=r9mpucdc7YsttM:&tbnh=121&tbnw=120&prev=/images%3Fq%3Dnatural%2BPond%26hl%3Den%26safe%3Dactive%26um%3D1&ei=153fSZv0OoH-swORnPmjDg
http://en.wikipedia.org/wiki/Miranda_July
http://en.wikipedia.org/wiki/Harrell_Fletcher
http://en.wikipedia.org/wiki/Mel_Chininsideartneworleans.blogspot.com/2009/02/febr...
http://images.google.com/images?hl=en&safe=active&rlz=1T4DKUS_enUS227US228&um=1&sa=3&q=mel+chin+%2B+revival+field
http://report.aruna.ir/pic/Christo%20and%20Jeanne-Claude.jpg
http://www.nyc.gov/html/thegates/images/photos/04_running_fence.jpg
Gardener’s Art Through the Ages: 11th edition
http://images.google.com/imgres?imgurl=http://www.nga.gov/exhibitions/2002/christo/images/large/67.jpg&imgrefurl=http://www.nga.gov/exhibitions/2002/christo/67fs.htm&usg=__ezlvao3A4ibzPqxa8pahRatmKtI=&h=389&w=505&sz=55&hl=en&start=11&sig2=dsAp7M2dUGZLueMjCvVU9w&um=1&tbnid=_lEO86nkOCFgZM:&tbnh=100&tbnw=130&prev=/images%3Fq%3Dchristo%2Band%2Bjeanne%2Bclaude%2Bvalley%2Bcurtain%26hl%3Den%26safe%3Dactive%26rlz%3D1T4DKUS_enUS227US228%26um%3D1&ei=qbPfSZXjFJ2MtgPet5CeDg
http://www.boston.com/bostonglobe/ideas/brainiac/christobisquayne.jpg
http://www.christojeanneclaude.net/sharedMedia/runfen/thumb/RFlightWickTHU.jpg
http://www.econsciousmarket.com/eco-times/wp-content/uploads/2008/07/umbrellas-by-jeanne-claude-christo.jpg
http://www.ashevilleart.org/images/stories/wrappedcoast.jpg
http://images.google.com/imgres?imgurl=http://boingboing.net/images/spiral-jetty-08.jpg&imgrefurl
http://en.wikipedia.org/wiki/Robert_Smithson
POWERPOINT
My Thoughts:
I really liked this lesson. I would definitely simplify the complexity theory for the younger grades, maybe focus on one aspect of it. I loved the idea of using texture and creating a cumulative ocean scene. We actually did something similar in my 4th grade class, we made a tide pool. Everyone was assigned to different creatures and we made and painted our animals and then set it up in the classroom. Very fun. I would probably do something similar only teach a little about art with it.
Wednesday, April 22, 2009
Week 13 -Hedonist Theory
Hedonist Theory What is it?
Hedonist art, is art that brings pleasure - based on your initial reaction. Since pleasure is a very personal thing, this art theory is also personal and can be seen differently from person to person
INTEGRATED LESSON PLAN
Lesson Plan: Hedonist Theory and Habitats/Environments—4th/5th Grade
By Kimberly Brown
Exploration: Explore the Hedonist theory as well as Habitats/Environments.
Objectives:
(1) Skills: the student will use collage techniques to create a picture of an environment that would be familiar and pleasing to an animal of their choosing.
(2) Cognition: the student will gain a basic understanding of the hedonist theory, various habitats, and how the concept of belonging ties them together
(3) Affects: the student will explore what is pleasing to them about different art and different surroundings
Time Needed: 60 minutes
State Standards:
4TH GRADE
Standard 5
Students will understand the physical characteristics of Utah's wetlands, forests, and deserts and identify common organisms for each environment.
a. Identify common plants and animals that inhabit Utah's forests, wetlands, and deserts.
b. Cite examples of physical features that allow particular plants and animals to live in specific environments (e.g., duck has webbed feet, cactus has waxy coating).
Standard 3
The student will choose and evaluate artistic subject matter, themes, symbols, ideas, meanings, and purposes.
Objective 1
Explore possible content in art prints or works of art.
a. Examine the overall value key of significant works of art and relate the key of each work to a mood.
5TH GRADE
Standard 3
(Expressing): The student will choose and evaluate artistic subject matter, themes, symbols, ideas, meanings, and purposes.
Objective 2 Discuss, evaluate, and choose symbols, ideas, subject matter, meanings, and purposes for students ' own artworks.
• Use a personal experience as inspiration to create a work of art.
• Convey an idea, such as pride or love of one's family, through a work of art.
National Standards:
4TH GRADE
NS.K-4.3 Life Science:
As a result of activities in grades K-4, all students should develop understanding of
• Organisms and environments
NA-VA.K-4.5: Reflecting upon and assessing the characteristics and merits of their work and the work of others
Achievement Standard:
• Students understand there are various purposes for creating works of visual art
• Students describe how people's experiences influence the development of specific artworks
• Students understand there are different responses to specific artworks
5TH GRADE
NA-VA.5-8.5: Reflecting upon and assessing the characteristics and merits of their work and the work of others.
Achievement Standard:
• Students compare multiple purposes for creating works of art
• Students describe and compare a variety of individual responses to their own artworks and to artworks from various eras and cultures
NS.5-8.3 Life Science:
As a result of their activities in grades 5-8, all students should develop understanding
• Populations and ecosystems
Lesson Sequence:
a. Introduction:
i. Spread art books of artwork among the class. Let the students decide what art works make them happy and bring them pleasure (See Assessment #3) and share with their groups.
b. Presentation:
i. Discuss Hedonist Theory
1. What it means—Art should bring pleasure
a. Hallmarks of Hedonist Art
2. Rococo, 18th century French Style
a. Frivolous and dainty and curly
b. Interior Design—form
c. Paintings—themes and style
3. How people find different art pleasing
a. Point to introduction activity
b. Have the students decide if the art lives up to the hedonist theory , “Good or Bad, Happy or Sad?” Game
c. Artist that usually brings me pleasure—familiar, Rockwell
d. Share what I’ve discovered from asking people
e. Share whys—Introduce local artist that has art that brings me pleasure, John Hughes
ii. Transition:
1. Where do you Belong? Ask students if art that brings them pleasure sometimes has a relationship to a familiar place.
iii. Discuss Habitats:
1. What is a habitat—The environment around an animal, where it lives
2. Types of habitats (can be adapted to fit state standards, i.e. Utah habitats or world’s biomes)
a. For Utah:
i. Wetlands
ii. Forest
iii. Desert
b. Questions for each habitat
i. What animals live there?
ii. Why does that animal lives there and not somewhere else?
c. Project/ Demonstration:
i. Prompt: “You are an animal from one of the habitats we studied. Create an artwork that would bring you pleasure because it reminds you of home.” (Show Madagascar clip)
ii. Collage type: water color washed background with torn water color on top
iii. Materials:
1. Glue (sticks)
2. Water colors
3. Crayons (optional)
4. “Canvas” Paper and collage paper, 2 sheets of water color paper/per student
***No Scissors Needed***
iv. Demonstration: Review how to wash with water colors. Show the students that simple shapes can be made either by painting them or tearing painted water color paper, giving a textured and interesting look.
d. Work Time: 20-30 minutes
e. Clean Up and Management:
i. Plan on about 5 minutes for clean up (throwing away scraps and putting materials away.
f. Closure:
i. After everything is cleaned up, have the students sit in groups with their collages.
ii. Small group discussion: What animal they would they be, why their animal would find their collage pleasing, and how the collage reflects the animal’s natural environment (see assessment #1).
iii. Class discussion or Personal Prompt (depending on time): discuss or answer personally the following questions. “What is your habitat? Where do you feel you belong? When you see things that remind you of that place, what do you feel? Would you say that art that reminds you of where you belong is hedonistic art? Why or why not?” (see assessment #2)
Assessment:
1) They will also orally share in small groups why their animal would find their collage pleasing and how the collage reflects the animal’s natural environment.
2) They will answer in a short paragraph the following prompt: “What is your habitat? Where do you feel you belong? When you see things that remind you of that place, what do you feel? Would you say that art that reminds you of where you belong is hedonistic? Why or why not?”
3) Students will select art that is pleasing to them, and share why they find it pleasing orally in small groups.
Additional Prompts:
• Start a collection of things that are pleasing to you in a book (You can include art, quotes, photos, and notes, etc). Keep it handy for those times you just need something pleasing to lift you up.
• How would you make a collage of the same biome differently if you were making it from the perspective of a large animal than from the perspective of a small animal?
• What different media, styles, or techniques would you use for each habitats?
• All the habitats have things that may seem negative as well as positive to different people (extreme temperatures, little water, frightening creatures, etc.). Can the whole truth of a place be revealed in an artwork that is always pleasing? What are other problems can you see with using the Hedonistic theory as a basis for art?
Reflections:
Lessons work best when you have some flexibility in the direction you want to go. When I started studying the Hedonist Theory, I was planning on doing an entirely different lesson, but the more I learned, the more natural this direction came. After I went over standards, I just made a few adaptations in presentation to fit, and it still feels natural. Having a big idea concept helps me feel the purpose of my lesson, and see that it is deeper than just an art theory or a science lesson, but a personal connection for each student. I will be better at finding the overarching concepts that create connections for students for all my future lesson plans.
Resources and references:
Standards
http://www.education-world.com/standards/
Hedonism
http://en.wikipedia.org/wiki/Hedonism
http://www.johnhughesstudio.com/index.htm
http://en.wikipedia.org/wiki/Rococo
Habitats
http://www.surweb.org/ls/ls_view.asp?lsid=2155 http://www.emints.org/ethemes/resources/S00001667.shtml
http://www.surweb.org/ls/ls_view.asp?lsid=2100
http://extension.usu.edu/forestry/Reading/Assets/PDFDocs/NR_FF/NRFF...
http://www.usoe.k12.ut.us/curr/science/core/4th/4thSciber/4th/envir...
http://wildlife.utah.gov/projectwild/magazine/life_zones.pdf
Project Ideas
http://www.artprojectsforkids.org/ Share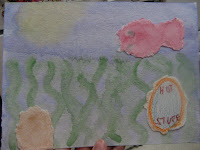
This is my beta fish habitat. Notice the mirror to satisfy his vanity.
My Thoughts:
This is a great lesson plan. I love the tie with habitats, and habitats are a fun thing to study! I really wouldn't make any variations to this lesson. I would make sure that we had already been discussing habitats and maybe make this a culminating project.
Hedonist art, is art that brings pleasure - based on your initial reaction. Since pleasure is a very personal thing, this art theory is also personal and can be seen differently from person to person
INTEGRATED LESSON PLAN
Lesson Plan: Hedonist Theory and Habitats/Environments—4th/5th Grade
By Kimberly Brown
Exploration: Explore the Hedonist theory as well as Habitats/Environments.
Objectives:
(1) Skills: the student will use collage techniques to create a picture of an environment that would be familiar and pleasing to an animal of their choosing.
(2) Cognition: the student will gain a basic understanding of the hedonist theory, various habitats, and how the concept of belonging ties them together
(3) Affects: the student will explore what is pleasing to them about different art and different surroundings
Time Needed: 60 minutes
State Standards:
4TH GRADE
Standard 5
Students will understand the physical characteristics of Utah's wetlands, forests, and deserts and identify common organisms for each environment.
a. Identify common plants and animals that inhabit Utah's forests, wetlands, and deserts.
b. Cite examples of physical features that allow particular plants and animals to live in specific environments (e.g., duck has webbed feet, cactus has waxy coating).
Standard 3
The student will choose and evaluate artistic subject matter, themes, symbols, ideas, meanings, and purposes.
Objective 1
Explore possible content in art prints or works of art.
a. Examine the overall value key of significant works of art and relate the key of each work to a mood.
5TH GRADE
Standard 3
(Expressing): The student will choose and evaluate artistic subject matter, themes, symbols, ideas, meanings, and purposes.
Objective 2 Discuss, evaluate, and choose symbols, ideas, subject matter, meanings, and purposes for students ' own artworks.
• Use a personal experience as inspiration to create a work of art.
• Convey an idea, such as pride or love of one's family, through a work of art.
National Standards:
4TH GRADE
NS.K-4.3 Life Science:
As a result of activities in grades K-4, all students should develop understanding of
• Organisms and environments
NA-VA.K-4.5: Reflecting upon and assessing the characteristics and merits of their work and the work of others
Achievement Standard:
• Students understand there are various purposes for creating works of visual art
• Students describe how people's experiences influence the development of specific artworks
• Students understand there are different responses to specific artworks
5TH GRADE
NA-VA.5-8.5: Reflecting upon and assessing the characteristics and merits of their work and the work of others.
Achievement Standard:
• Students compare multiple purposes for creating works of art
• Students describe and compare a variety of individual responses to their own artworks and to artworks from various eras and cultures
NS.5-8.3 Life Science:
As a result of their activities in grades 5-8, all students should develop understanding
• Populations and ecosystems
Lesson Sequence:
a. Introduction:
i. Spread art books of artwork among the class. Let the students decide what art works make them happy and bring them pleasure (See Assessment #3) and share with their groups.
b. Presentation:
i. Discuss Hedonist Theory
1. What it means—Art should bring pleasure
a. Hallmarks of Hedonist Art
2. Rococo, 18th century French Style
a. Frivolous and dainty and curly
b. Interior Design—form
c. Paintings—themes and style
3. How people find different art pleasing
a. Point to introduction activity
b. Have the students decide if the art lives up to the hedonist theory , “Good or Bad, Happy or Sad?” Game
c. Artist that usually brings me pleasure—familiar, Rockwell
d. Share what I’ve discovered from asking people
e. Share whys—Introduce local artist that has art that brings me pleasure, John Hughes
ii. Transition:
1. Where do you Belong? Ask students if art that brings them pleasure sometimes has a relationship to a familiar place.
iii. Discuss Habitats:
1. What is a habitat—The environment around an animal, where it lives
2. Types of habitats (can be adapted to fit state standards, i.e. Utah habitats or world’s biomes)
a. For Utah:
i. Wetlands
ii. Forest
iii. Desert
b. Questions for each habitat
i. What animals live there?
ii. Why does that animal lives there and not somewhere else?
c. Project/ Demonstration:
i. Prompt: “You are an animal from one of the habitats we studied. Create an artwork that would bring you pleasure because it reminds you of home.” (Show Madagascar clip)
ii. Collage type: water color washed background with torn water color on top
iii. Materials:
1. Glue (sticks)
2. Water colors
3. Crayons (optional)
4. “Canvas” Paper and collage paper, 2 sheets of water color paper/per student
***No Scissors Needed***
iv. Demonstration: Review how to wash with water colors. Show the students that simple shapes can be made either by painting them or tearing painted water color paper, giving a textured and interesting look.
d. Work Time: 20-30 minutes
e. Clean Up and Management:
i. Plan on about 5 minutes for clean up (throwing away scraps and putting materials away.
f. Closure:
i. After everything is cleaned up, have the students sit in groups with their collages.
ii. Small group discussion: What animal they would they be, why their animal would find their collage pleasing, and how the collage reflects the animal’s natural environment (see assessment #1).
iii. Class discussion or Personal Prompt (depending on time): discuss or answer personally the following questions. “What is your habitat? Where do you feel you belong? When you see things that remind you of that place, what do you feel? Would you say that art that reminds you of where you belong is hedonistic art? Why or why not?” (see assessment #2)
Assessment:
1) They will also orally share in small groups why their animal would find their collage pleasing and how the collage reflects the animal’s natural environment.
2) They will answer in a short paragraph the following prompt: “What is your habitat? Where do you feel you belong? When you see things that remind you of that place, what do you feel? Would you say that art that reminds you of where you belong is hedonistic? Why or why not?”
3) Students will select art that is pleasing to them, and share why they find it pleasing orally in small groups.
Additional Prompts:
• Start a collection of things that are pleasing to you in a book (You can include art, quotes, photos, and notes, etc). Keep it handy for those times you just need something pleasing to lift you up.
• How would you make a collage of the same biome differently if you were making it from the perspective of a large animal than from the perspective of a small animal?
• What different media, styles, or techniques would you use for each habitats?
• All the habitats have things that may seem negative as well as positive to different people (extreme temperatures, little water, frightening creatures, etc.). Can the whole truth of a place be revealed in an artwork that is always pleasing? What are other problems can you see with using the Hedonistic theory as a basis for art?
Reflections:
Lessons work best when you have some flexibility in the direction you want to go. When I started studying the Hedonist Theory, I was planning on doing an entirely different lesson, but the more I learned, the more natural this direction came. After I went over standards, I just made a few adaptations in presentation to fit, and it still feels natural. Having a big idea concept helps me feel the purpose of my lesson, and see that it is deeper than just an art theory or a science lesson, but a personal connection for each student. I will be better at finding the overarching concepts that create connections for students for all my future lesson plans.
Resources and references:
Standards
http://www.education-world.com/standards/
Hedonism
http://en.wikipedia.org/wiki/Hedonism
http://www.johnhughesstudio.com/index.htm
http://en.wikipedia.org/wiki/Rococo
Habitats
http://www.surweb.org/ls/ls_view.asp?lsid=2155 http://www.emints.org/ethemes/resources/S00001667.shtml
http://www.surweb.org/ls/ls_view.asp?lsid=2100
http://extension.usu.edu/forestry/Reading/Assets/PDFDocs/NR_FF/NRFF...
http://www.usoe.k12.ut.us/curr/science/core/4th/4thSciber/4th/envir...
http://wildlife.utah.gov/projectwild/magazine/life_zones.pdf
Project Ideas
http://www.artprojectsforkids.org/ Share
- Attachments:
-
-
 Hedonist Theory.ppt, 14.3 MB
 -
 Hedonist-Belonging.docx, 26 KB
-

This is my beta fish habitat. Notice the mirror to satisfy his vanity.
My Thoughts:
This is a great lesson plan. I love the tie with habitats, and habitats are a fun thing to study! I really wouldn't make any variations to this lesson. I would make sure that we had already been discussing habitats and maybe make this a culminating project.
WEEK 11 - Crafts
Crafts vs Art
why is it that crafts are often not seen as art? How did the painter's work suddenly become more valuable that the basket weaver's work? My answer is, perceived value. Paintings and sculpture were and are luxuries so people "value" them more (or are willing to pay more for them). Baskets and Rugs are more like everyday items. However, I think it is still important to recognize crafts as art because craftsmen have just as much skill and creativity as any other artist.
Fimo/Sculpy Rings
We made rings! It was actually kind of tricky but a lot of fun.
Here are some examples of what we made:


ARTIST
We also looked at this professional craftsman who make amazing rings:
Gabriel Caig
Integration
I am not sure how I would integrate the rings into the core curriculum's, maybe if there was a book that was centered around a ring (like Lord of the Rings - but more age appropriate) or maybe around treasure. However, if I was just having students sculpt things with the Fimo then there are endless possibilities for integration.
why is it that crafts are often not seen as art? How did the painter's work suddenly become more valuable that the basket weaver's work? My answer is, perceived value. Paintings and sculpture were and are luxuries so people "value" them more (or are willing to pay more for them). Baskets and Rugs are more like everyday items. However, I think it is still important to recognize crafts as art because craftsmen have just as much skill and creativity as any other artist.
Fimo/Sculpy Rings
We made rings! It was actually kind of tricky but a lot of fun.
Here are some examples of what we made:
ARTIST
We also looked at this professional craftsman who make amazing rings:
Gabriel Caig
Integration
I am not sure how I would integrate the rings into the core curriculum's, maybe if there was a book that was centered around a ring (like Lord of the Rings - but more age appropriate) or maybe around treasure. However, if I was just having students sculpt things with the Fimo then there are endless possibilities for integration.
WEEK 11 -New Formalist Theory
What is it?
The New Formalist Theory looks at the formal qualities of an art work using other/alternative elements and principles of design, that have new context or meaning. (For example, instead of saying that an artwork is good because of how the elements of line and color are used to achieve the principle of harmony, you could say that the edges and brightness achieve excitement...or any other new vocabulary that describes the formal qualities of that work.)
Integrated Lesson Plan
Brett Baldry
Brittany Crowder
New Formalist Geometry Lesson
4th
30-45 minutes
Exploration: Students will explore the New Formalist Theory.
Objective: When finished with the lesson we want kids to be able to understand New Formalism and how it relates to life through geometry.
State Standard:
Grade 4 Visual Arts
Standard 2:
Objective 1- Analyze and reflect on works of art by their elements and principles.
Grade 4 Mathematics Core
Standard 3:
Objective 1 Identify and describe attributes of two-dimensional geometric shapes.
Question of Inquiry: How could you critique art using the New Formalist Theory.
Arts Discussed: Michelangelo, Olivia Gude, Lee Quinones
Other Subject Connections: Geometry
Teacher Visuals/ Supplies:
• Power Point on New Formalism
Preparation: Cut out different shapes for kids to create a mosaic using these shapes.
Student Materials
• Scissors, glue, 8*11 sheet of paper for each kid
• Pencil Crayons
Lesson Sequence:
1. Start by asking the class the question “What is Formalism?” Once they have an idea of formalism move onto the question “what is new?” From there form a definition of the New Formalist Theory
2. Then have two opposing pictures. One being a piece of New Formalism art and one being Formalism. Have the class see if they can pick out which piece of art would be the New Formalism.
3. Ask the class questions that will get them thinking more about the context and history behind the piece of art that you have chosen. Once again explaining that New Formalism brings in new features other than line, color…
4. Show pieces of Olivia Gude’s Art or Lee Quinone’s art. They are New Formalists. Discuss with the class how their art brings in more context or meaning.
5. Ask the class what are some other things in our lives that have good form but also have great meaning to us… Religion. Open the class up for discussion.
6. If you wanted to tie in other cores you could talk about geometry. Talk about how in formalism you use simple geometry like shapes. But in more advanced geometry classes you start to give these shapes meaning by giving them angles and lengths. By giving them more detail we can then use them as a mathematical tool in our lives.
Assessment:
-Class discussion about the artists (what did they like? how did each artist’s culture influence his/her work?, ect.)
- have kids volunteer to discuss their mosaic, and what it means to them.
Resources:
Formalism, picture of formalism:
http://en.wikipedia.org/wiki/Formalism_(art)
Michelangelo’s David:
http://en.wikipedia.org/wiki/David_(Michelangelo)
Olivia Gude:
http://www.uic.edu/classes/ad/ad382/sites/Olivia/OG_01a.html
Lee Quinones:
http://ps1.org/exhibitions/view/147
http://www.leequinones.com/index.php?page=about
http://www.absoluteastronomy.com/topics/Lee_Quinones
DC Temple Pic:
http://www.foulgerpratt.com/const_projects/washingtondc_temple.php
Prototype:

My Thoughts:
I liked this lesson, I especially liked making the mosaics. I thought geometry was a wonderful and natural tie into the core curriculum. I would definitely use mosaics and geometry together in my classroom. I think it would be more meaningful to make their mosaics of a common object, but recreate that object, or make it stand out through the mosaic, just like Olivia Gude did with the park benches.
WeeK 10 Photography!
For photograpy we made photo-grams (also called Rayo-grams) where we put objects on photo paper (that was treated by chemicals) out in the sun to make some cool "photography" (great way to teach your students about photography, etc)
...to make a Photo-gram:
1. inverse copy (negative copy) an image in black & white on overhead paper
2. coat regular white paper with a mixture of Ammonium Iron Citrate & Potassium Ferricyanide mixed with distilled water using a sponge brush
3. let dry in light-tight room (dark room)
4. take outside & arrange objects on top (let stand for 5-15 mins)
5. rinse in water (5 mins)
6. immerse in diluted hydrochloric acid
7. let dry
cyanotype kits
MY THOUGHTS:
Once again, I loved it. I would definitely use this technique with my class. You can do it with children of any age! I would have my students make a collage of something we were learning about and then make the overheads for them - Have the paper ready to go and have fun!
...to make a Photo-gram:

1. inverse copy (negative copy) an image in black & white on overhead paper

2. coat regular white paper with a mixture of Ammonium Iron Citrate & Potassium Ferricyanide mixed with distilled water using a sponge brush
3. let dry in light-tight room (dark room)
4. take outside & arrange objects on top (let stand for 5-15 mins)
5. rinse in water (5 mins)
6. immerse in diluted hydrochloric acid
7. let dry
cyanotype kits
PROTOTYPE: Cyanotype - use objects directly on top
 Rayogram - use a negative of something
 Cyanotype - use objects directly on top
 Rayogram - use a negative of something
MY THOUGHTS:
Once again, I loved it. I would definitely use this technique with my class. You can do it with children of any age! I would have my students make a collage of something we were learning about and then make the overheads for them - Have the paper ready to go and have fun!
Week 10 - Neo-rationalist Theory
What is it?
To put it very simply, neorationalism is simply taking other artists ideas or styles and making them your own. It is pretty much imitating another artist's style to make your own work.
This seems to be a pretty natural theory to use with children due to the fact that they already use imitation to learn things. I think it would be important to stress the "make it your own" aspect of this theory so that students would not feel so constrained in their projects.
INTEGRATED LESSON PLAN
My Thoughts:
This was a very interesting lesson plan. We discussed whether we thought Alexandra Nechita should be famous just because she painted like Picasso. We talked about the time and effort that artists go through to become known. We discussed how Alexandra Nechita is trying to get away from the "petite picasso" label and is trying to make a name for herself. There were two options we decided on:
1) She does not deserve the fame/recognition because she is only praised for her similarity to Picasso.
2) She may not have deserved fame at first, but she has pursued her artistry and has been trying to create a name for herself. The key is that she is still working and not trying to ride off of her laurels.
I really liked how we tied the neo rationalism into poetry becuase that is how you learn to write poetry, you imitate others. I did it all the time in school. It would be fun to try to have students add art to the poetry by creating an illustration of the poem by using another artist's style.
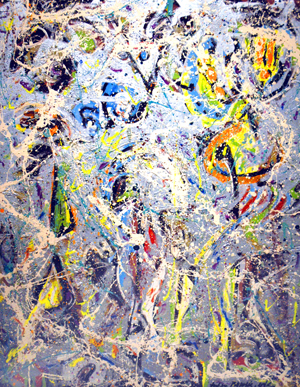
I also loved making the Jackson Pollock imitations. VERY fun. I would love to be able to get a huge piece of fabric and have my students all be able to dribble and splatter the paint on it to get an idea of what it was like. However, it would have to be a VERY structured activity so the students would not make a mess of themselves. Smocks would be
a wonderful idea.
Prototypes
 Imitation
To put it very simply, neorationalism is simply taking other artists ideas or styles and making them your own. It is pretty much imitating another artist's style to make your own work.
This seems to be a pretty natural theory to use with children due to the fact that they already use imitation to learn things. I think it would be important to stress the "make it your own" aspect of this theory so that students would not feel so constrained in their projects.
INTEGRATED LESSON PLAN
- Becky & Nayelli
Neo-Rationalist Theory and Poetry
Exploration: Students will explore the Neo-Rationalist Theory
Objective: Students will be able to understand the concepts of the Neo-Rationalist Theory and how it applies to writing.
State Standard:
Grade: 2 Fine Arts
Standard: 2
Objective 1- Identify significant works of art that have the appearance of depth.
Grade: 2 Language Arts
Standard: 8
Objective 1- Prepare to write by gathering and organizing information and ideas.
Question of Inquiry: How can you apply the Neo-Rationalist Theory to your own art, by taking concepts or ideas from other artists and using these aspects in your own creativity.
Arts Discussed: Alexandra Nechita, Picasso, Jackson Pollack
Other Subject Connections: Language Arts: poetry
Teacher Visuals/ Supplies: PowerPoint on Neo Rationalist Theory, Tempur paint, Paper, Paintbrushes
Preparation: Prepare paint and brushes for students to recreate their own Jackson Pollack
Student Materials:
• Tempur Paint
• 8x11 paper
• Brushes
• “Art smock”—Jackson Pollack recreations are messy :)
Lesson Sequence:
1. Discuss the idea of Neo-Rationalism in simpler terms: we adopt ideas from other artists and recreate them in our own way.
2. Discuss Alexandra Nechita and how she is named the “Petit Picasso.” Discuss how she adopted Picasso’s techniques in cubism and invented her own way of art.
3. Ask students if they think this theory of creating their own work by adopting others’ ideas is good or bad. Discuss that some theories are neither good or bad. Discuss the way in which we adopt others ideas in other ways other than art: hairstyles, fashion, recipes, interior design, literature, movies.
4. Discuss that imitating, assimilating then innovating is a way we learn
5. Discuss how we can find our own inspiration through many different mediums.
6. If you wanted to tie in Neo-Rationalism to other cores, you could talk about poetry. You could read a Shel Silverstein or Dr. Suess poem and then have the students recreate their own poem using the same style/format that Silverstein or Dr. Suess uses.
Assessment:
• Discuss Jackson Pollack’s technique of creating his art
• Have students recreate their own Jackson Pollack artwork, but emphasize that they can choose to use any colors of their choice, just adopt the technique of applying the paint to the paper.
Resources:
http://www.sojournmusic.com/2008/07/22/imitate-assimilate-then-inno...
Teaching Creativity:
http://www.goshen.edu/~marvinpb/arted/tc.html
Alexandra Nechita and the Petit Picasso:
http://www.lewisbond.com/nechita/about_nechita.html
Video on Alexandra Nechita:
http://www.cnn.com/exchange/blogs/ypwr/2007/11/alexandra-nechita_26...
My Thoughts:
This was a very interesting lesson plan. We discussed whether we thought Alexandra Nechita should be famous just because she painted like Picasso. We talked about the time and effort that artists go through to become known. We discussed how Alexandra Nechita is trying to get away from the "petite picasso" label and is trying to make a name for herself. There were two options we decided on:
1) She does not deserve the fame/recognition because she is only praised for her similarity to Picasso.
2) She may not have deserved fame at first, but she has pursued her artistry and has been trying to create a name for herself. The key is that she is still working and not trying to ride off of her laurels.
I really liked how we tied the neo rationalism into poetry becuase that is how you learn to write poetry, you imitate others. I did it all the time in school. It would be fun to try to have students add art to the poetry by creating an illustration of the poem by using another artist's style.
I also loved making the Jackson Pollock imitations. VERY fun. I would love to be able to get a huge piece of fabric and have my students all be able to dribble and splatter the paint on it to get an idea of what it was like. However, it would have to be a VERY structured activity so the students would not make a mess of themselves. Smocks would be
a wonderful idea.
Prototypes
 Imitation
Real Deal
Week 8 - Revisiting Textiles & New Media
I guess to go along with the Queer theory and unusual art Dan showed us how to make Recycled Yarn & how to Crochet with it! Since I was not able to attend this day, I missed out on the art projects that were made. HOWEVER, my classmate who has a blog was able to attend that day, and you can see some examples of the recycled yarn, and some other things as well click here
We looked at artists
- Cayce Zavaglia
- Joana Vasconcelos (crochet drawing on sculpture)
- Michael McDowell
- Emily Barletta
- Felieke Van Der Leest (jewelry)
- Dan Steinhilber (MOA exhibit)
- Sheila Pepe (radical knitting/subversive lace)
- Carol Hummel (Tree Cozy)
- Knitta (Hollywood)
MY THOUGHTS
Recycled Yarn. How cool is that? I am really bummed I missed that day. Darn orthodontist. I think that textile art is really neat. I love knitting, and have attempted to sew, and I think that creating things such as quilts and scarves can be just as artistic as any thing else. My Mom sews and has made some incredible dresses and quilts. I think it is cool that people are starting to see that as art.
I also looked through the above artists and it was really cool to see what people do with textiles! I never would have thought that people could even do some of those things. I think that I would try to introduce my students to these different art forms and would really stress how there are many different kinds of art, it just depends on how you look at it!
Subscribe to:
Comments (Atom)